Vertex Lighting in Blender
PGRC attempts to recreate many of the visual limitations (and resulting stylistic choices) of the Sega Saturn. One big element of the style is how the overall lighting for the environments was achieved. To understand it, let’s rewind time 2 major times in approaches to game lighting:
Modern: Realtime shadows
In this method, lighting is calculated in real-time casting realistic shadows from 1 or more light sources. This is great because it’s dynamic: you can move the light source and everything updates immediately! Requires a lot of CPU and GPU processing power.
Recent History: Lightmaps
In this method, lighting is pre-calculated ahead of time using a tool, which calculates very high quality shadows and shading, but is not dynamic. This is achieved with “lightmaps” which are special textures that contain the lighting information for the scene. Objects are rendered with their normal textures + mixed with these special lighting textures. Takes almost no CPU or GPU processing power, but uses a lot of memeory for the (comparitively) high resolution lightmap textures.
Ancient History: Vertex Colors
Now we find ourself in the Sega Saturn age. We don’t have enough CPU or GPU power to do realtime shadow calculations for an entire scene, and we don’t have enough memory to store lightmaps. However, each vertex in our 3D environment can store a color in addition to texture coordinates! The colors are also blended between each vertex across the face (triangle / quad) that they share with their neighboring vertices. Using this, we can mix the color from the main texture with the vertex colors to get some change in lighting across the scene!
This is the technique that PGRC uses for all of its built-in tracks.
Setting up and mainpulating Vertex Colors in Blender
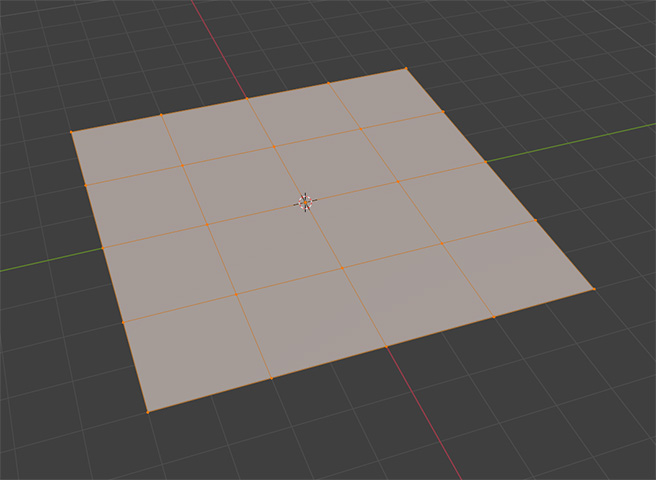
Here is an example of a single “tile” of parking garage environment from the game. It’s an 8m x 8m square, subdivided twice, so each “quad” in the model is a 2 meter x 2 meter square:
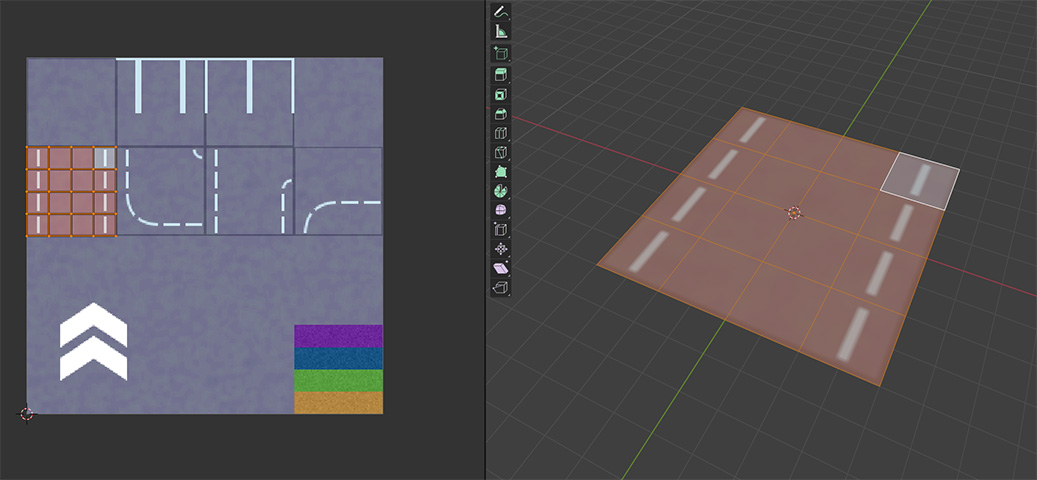
Often a portion of the overall texture for the garage is applied to this mesh, like below. This is what the model looks like with just the main texture and no lighting at all.
In blender, we can give a mesh vertex colors (just like the good old days!) pretty easily. Select your object, and open the Mesh tab and expand the Color Attributes section. Press the [+] button to create a new color attribute. Set the domain to “vertex” and click OK. Now your mesh has vertex colors!

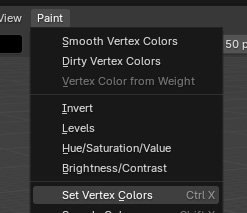
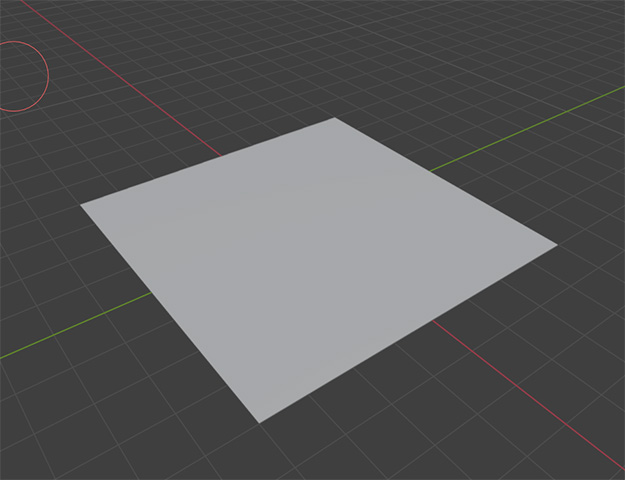
You can switch Blender into vertex paint mode to visualize and directly modify/paint vertex colors. At the start the colors will probably be black. You can set the tool color to white, and then use Paint > Set Vertex Colors to set all of the vertices of the mesh to white.
Now it will look like this
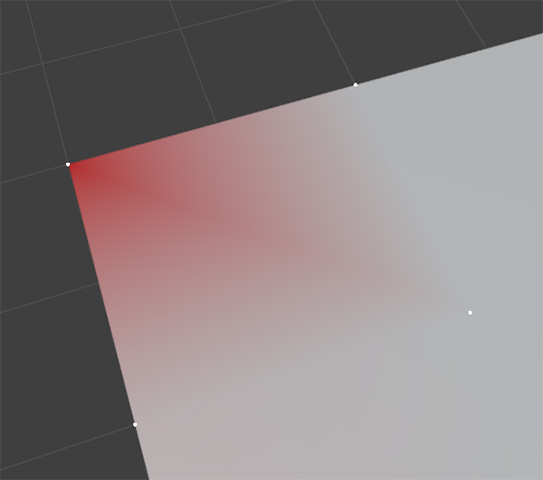
Vertex colors are blended between vertices, which you can see pretty clearly if you change the tool color and then paint just 1 vertex to a different color (such as red in the example):
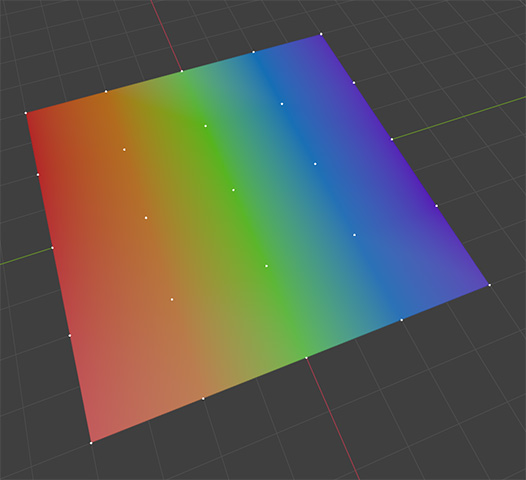
Here I have colored them in a quick rainbow pattern:
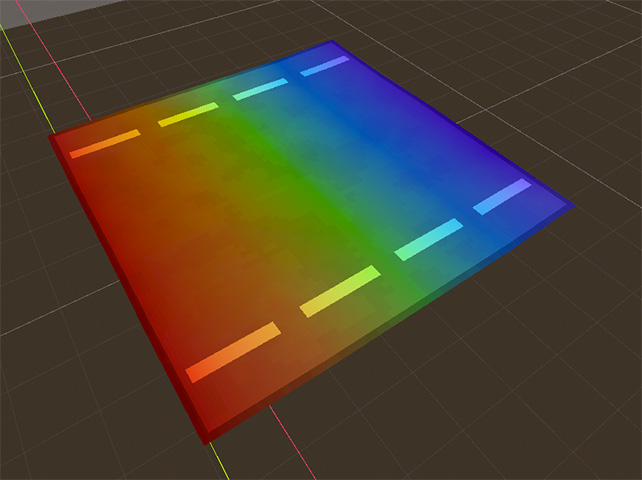
In-game, the main texture and the vertex colors get mixed together, so it will look like this:
You can manually paint vertex colors and be done (which was pretty common back in the Sega Saturn era I think), but we can also use the power of Blender to set up some lighting in the Blender scene, and then let Blender “bake” the lighting information into the vertex colors of our model(s) that make up our track. Let’s go through a simple example of how to do that now:
Baking vertex lighting in Blender
First, let’s make a bunch of copies of our mesh to simulate a larger area of the garage. We will also make a quick “wall” mesh and set up a few of those, just so we can see some more ligthing effects in action. Now our blender scene looks like this, first with the “Texture” rendering preview mode:
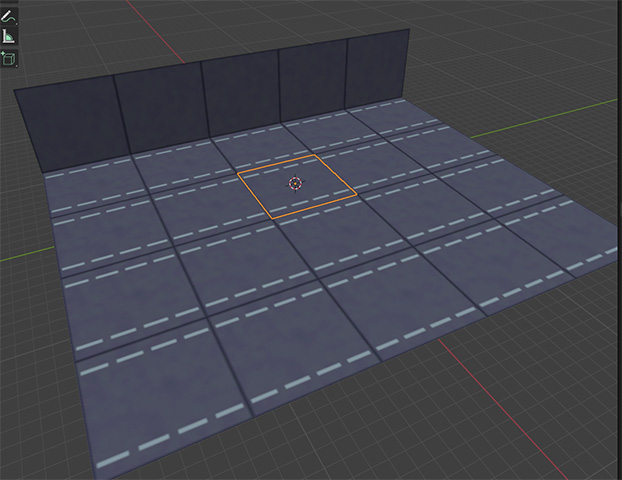
And now with the “Attribute” rendering preview mode (which will show the vertex colors)
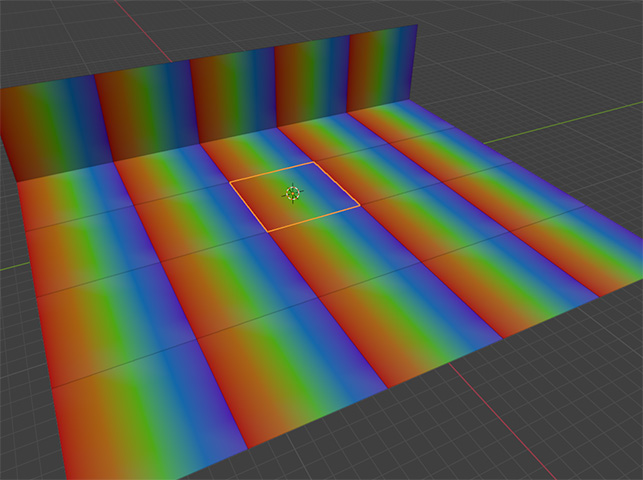
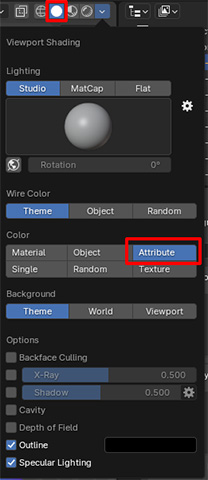
(by the way, you switch to the “attribute” rendering mode by selecting it as part of the “viewport shading” mode in Blender)
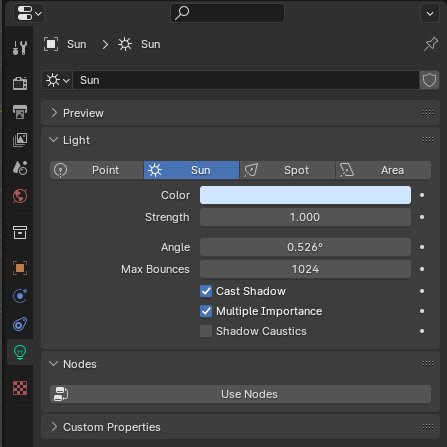
OK, it’s finally time to add some lights into the scene! You can add a light from the Add > Light menu, and selecting the type of light. In this example, I have added a “sun” light to simulate the general light from the sun, and also a “point” light simulating an electrical light you might find in a parking garage :)
The settings for the sun light are:
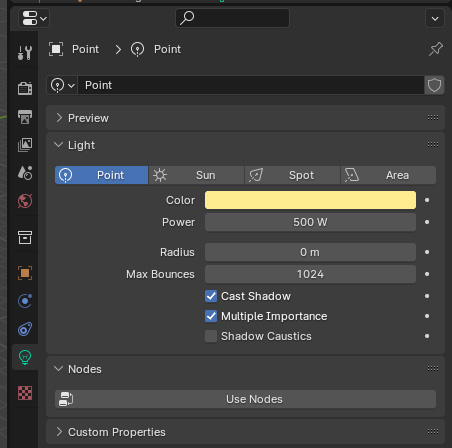
… and the point light:
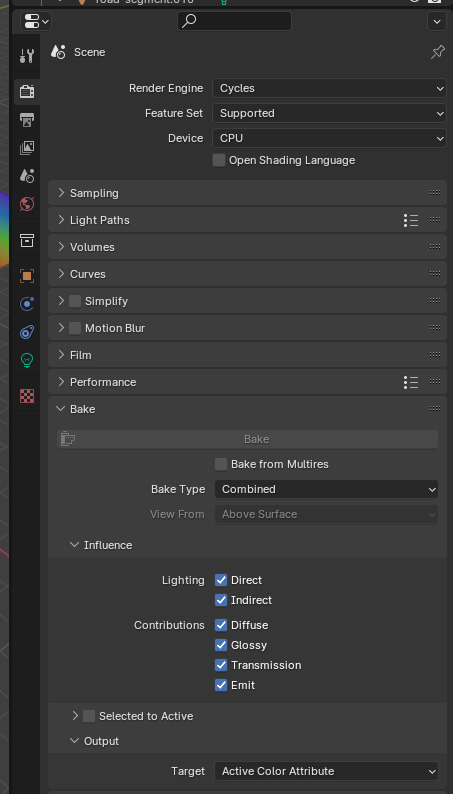
Now we want to bake the lighting information into the vertex colors of the models. In order to bake lighting, you need to be using the Cycles render engine in Blender, which you can select in the Render tab. Once you have Cycles selected, you can expand the “Bake” section, and adjust the settings. The most important setting for our purposes is that the Output Target is set to Active Color Attribute
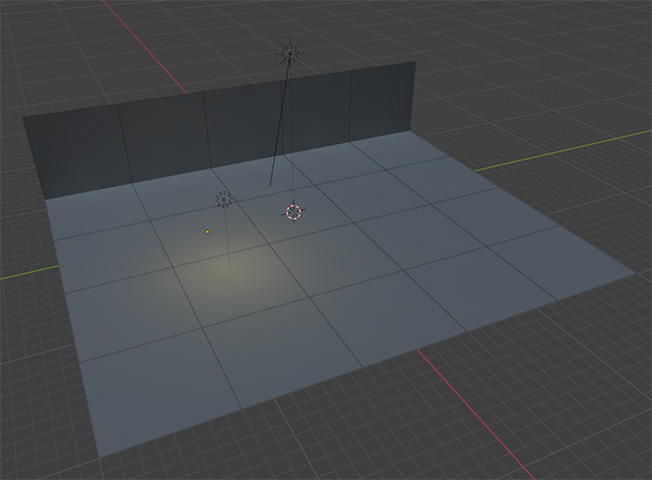
Now, select all of the objects you want to bake (only the mesh objects, not the lights), and click the “Bake” button! If everything goes smoothly, you will see the vertex colors get replaced with calculated ligthing based on your lights and materials.
You can also enchance it a bit by incorporating some Ambient Occlusion. The simplest way I have found to do this is to add ambient occlusion into the material on your object(s). Here is an example of how to do that:
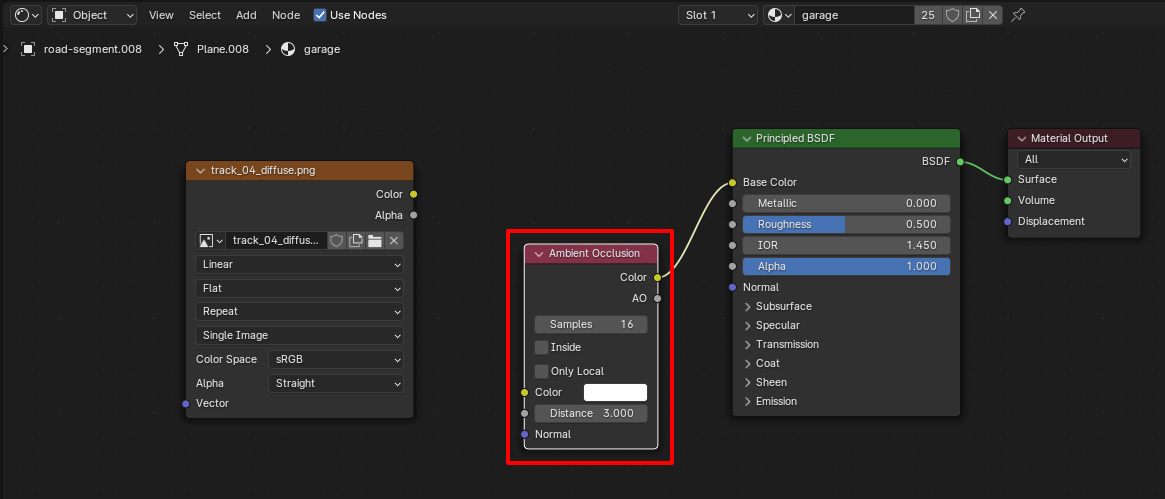
When Blender bakes the lighting, it will take into account the color of the material on the object, and the influence of the lights in the scene to calculate the final color that gets assigned to each vertex. If you just want simple lighting, you want your material to simply be white, so that only the lighting information is baked (not the colors from your textures for example). This example changes our material to be darker in the corners (ambient occlusion).
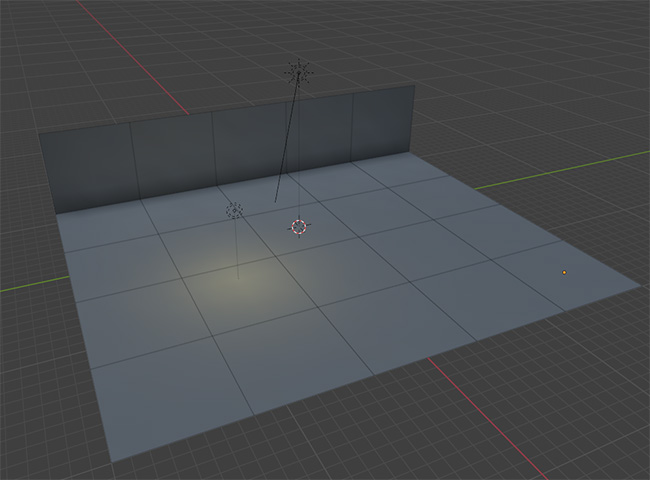
When we bake with the material set this way, you can see that corners are a bit darker and more realistic looking. Below is how this model can look in-game (you can see the in-game shader settings here as well for reference):
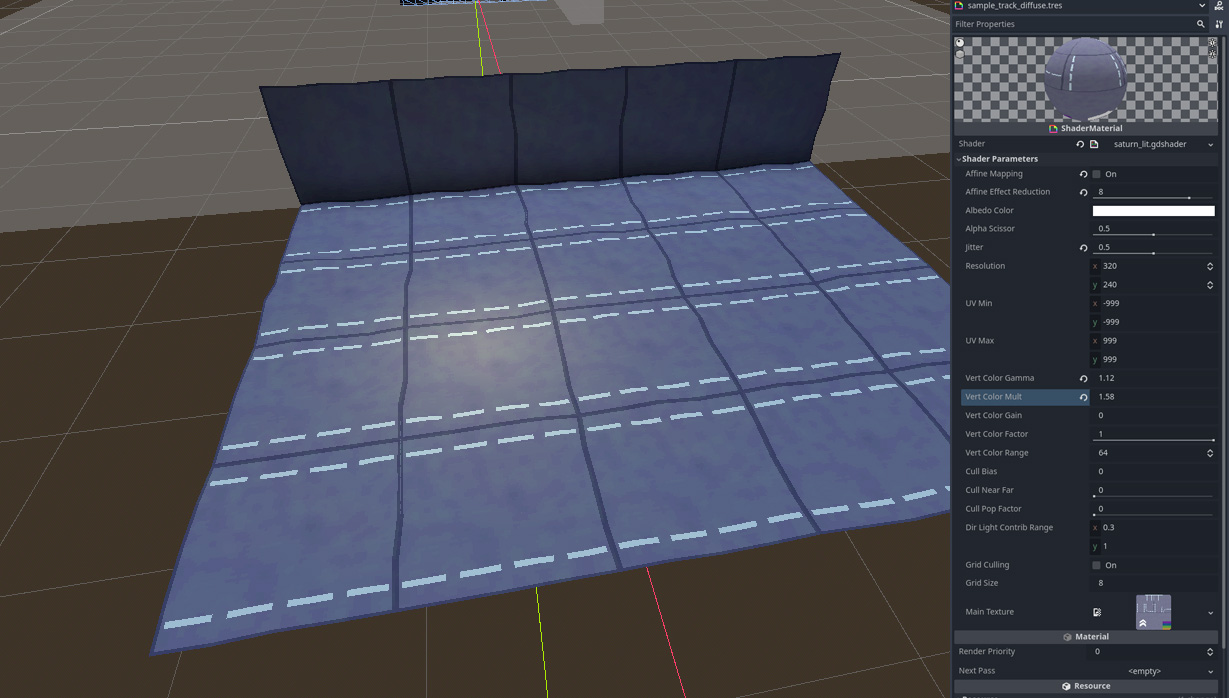
…And that’s the general method! Now you can make your tracks have Sega Saturn accurate-ish lighting just like the main tracks in PGRC!
Troubleshooting
There are several places where tiny issues can cause problems, here are a few I’m aware of that you might run into:
When I bake the lighting in Blender, some objects don’t look correct, or don’t update
I’ve seen this happen a lot, it seems to be related to duplicating an object many times and moving it around, and then when you bake, the vertex colors seem to be “shared” between some objects, causing the lighting to look incorrect. My incredibly reliable work around is this:
- Select all the objects you want to bake.
- Press [TAB] to go into edit mode
- Press [A] to select all the faces on all the objects
- Press [TAB] to exit edit mode.
- Press Bake to bake again.
It seems that going into edit mode and selecting the faces forces each object to refresh it’s data or something.
When I import my model into Godot, the vertex colors look weird
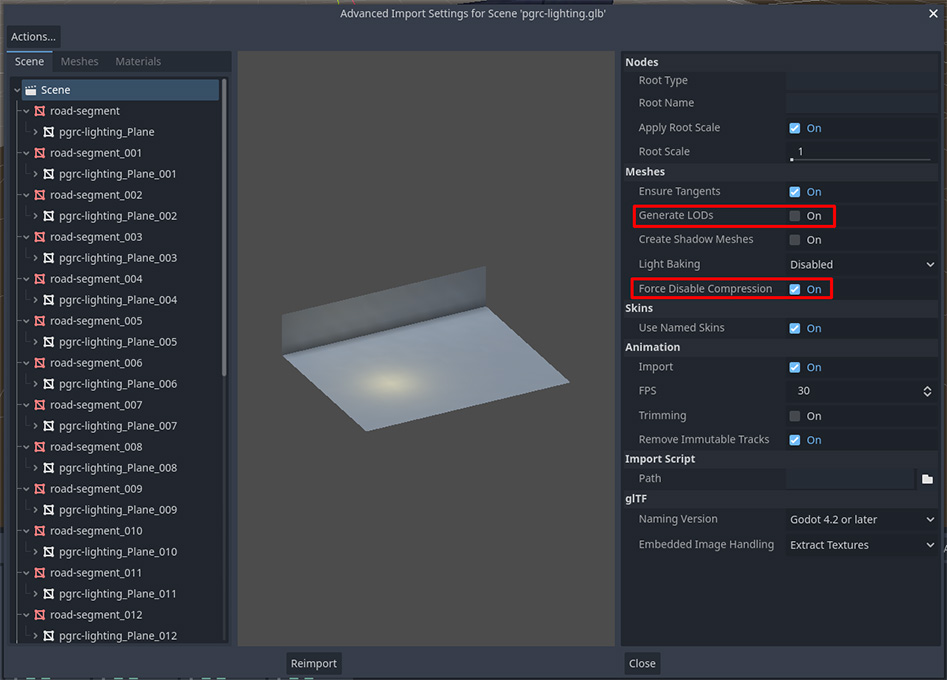
Godot is probably either generating a “LOD” (level of detail) mesh, or is trying to optimize the mesh. Find the model in the FileSystem tab and double-click it to bring up the import panel for the model. Make sure that Generate LODs is turned OFF, and Force Disable Compression is ON. It looks like this:
When I put my model into the scene, it doesn’t have the right material
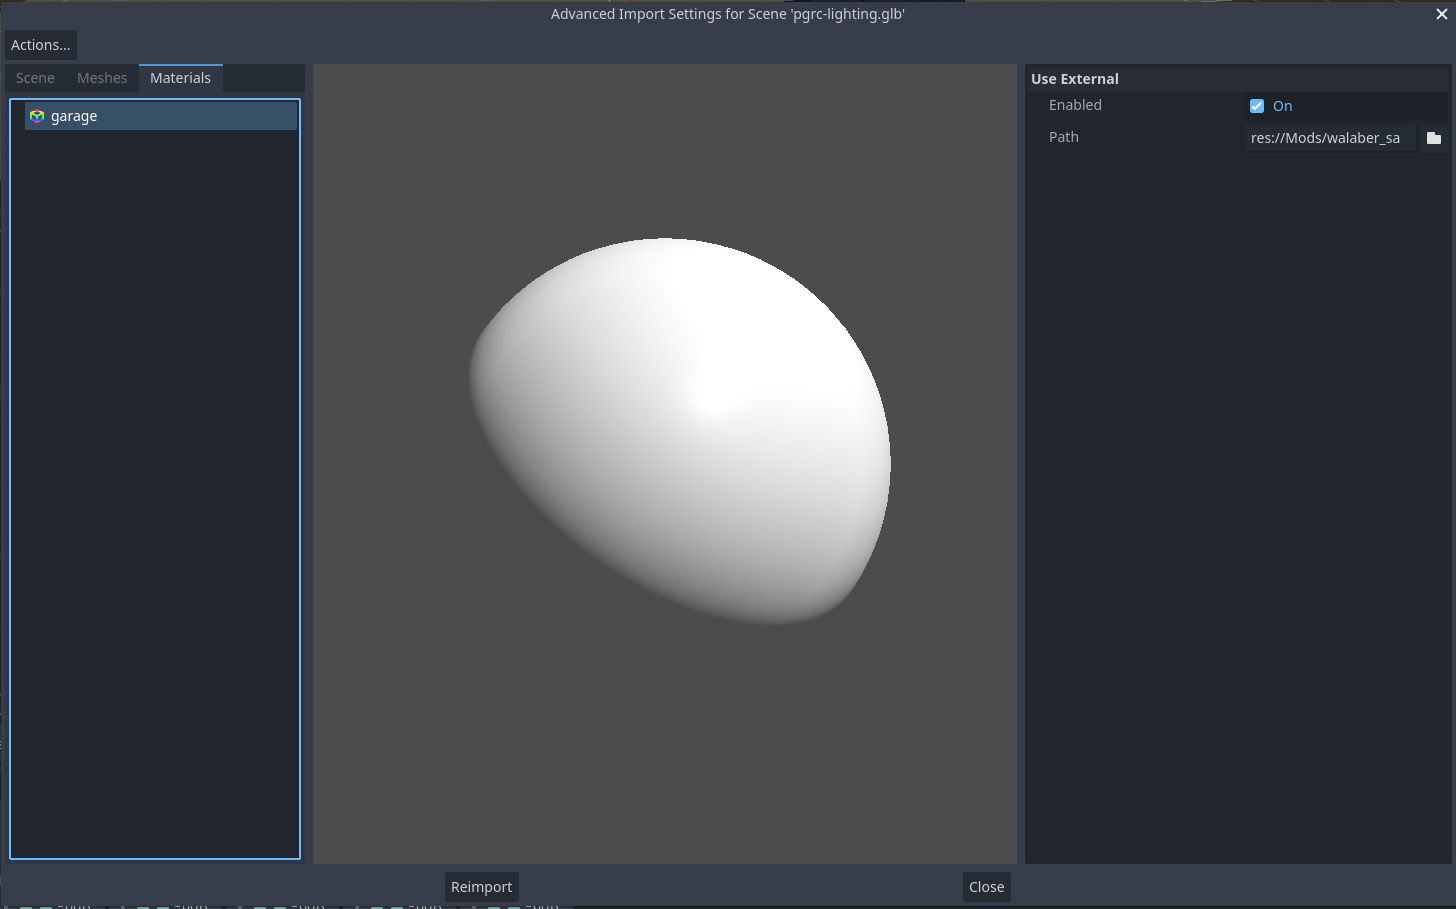
My method on the built-in tracks was always to make the final materials in Godot, and then map them onto the models. The way to do this is:
- Make sure you have created a material in Godot.
- Make sure the objects in Blender also have a material assigned, ideally with an easy-to-recognize name, such as “garage” or “grass” or “dirt” etc.
- In the model import panel in Godot (pictured above), go to the
MaterialsTab. - Select the blender file material name on the list on the left.
- On the right under “Use External”, set Enabled to ON.
- Click the folder icon next to “Path” and use the file selector to select your Godot material.
This will create a mapping so that any object in Blender with a given material will be set to use the associated Godot material.
